

AI Training → Knowledge in your OpenCX dashboard. Viewing needs the AI knowledge base permission. Creating, moving, scheduling, restricting or publishing needs AI knowledge base with write access. Pins and your own folder order only need view access.
Organize instructions in folders
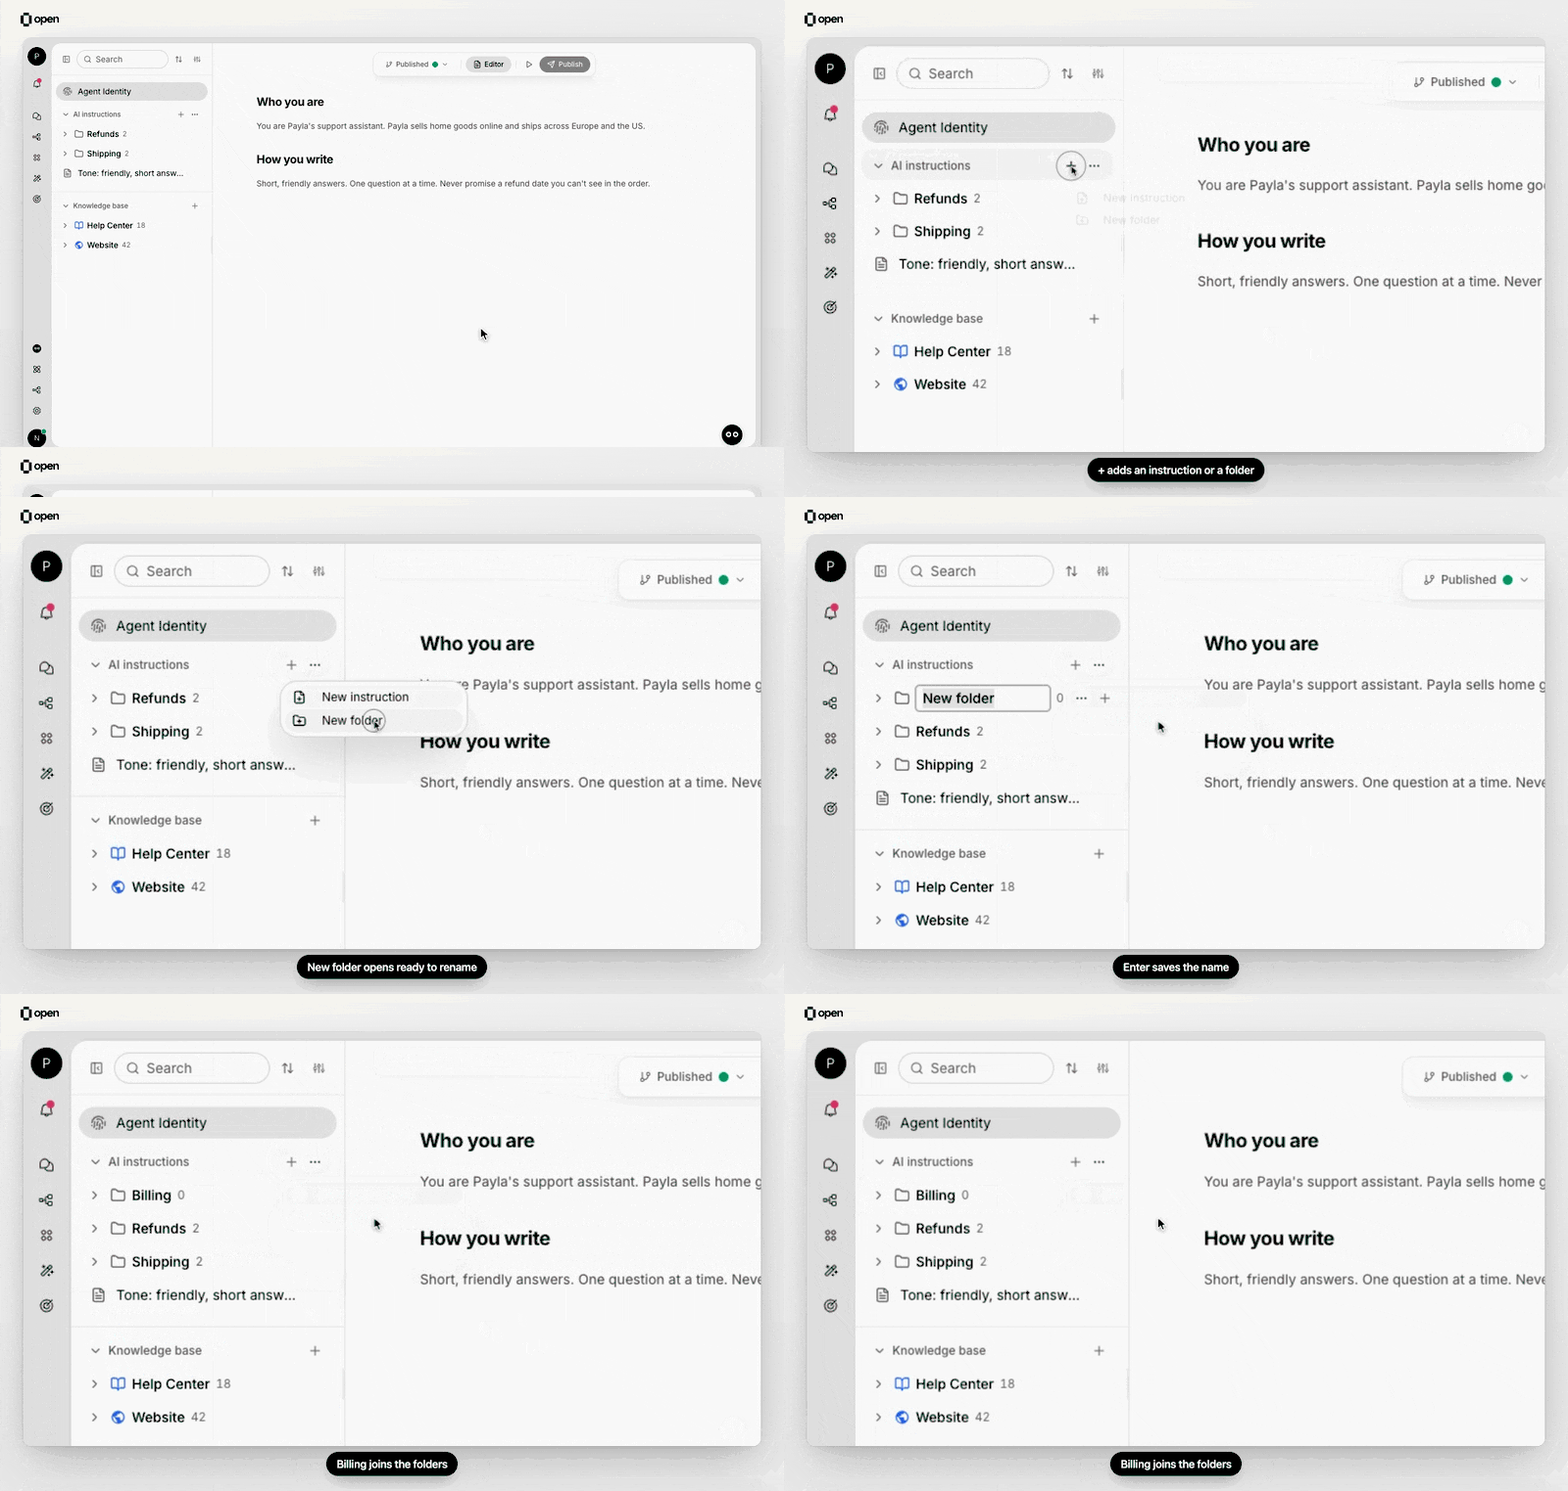
Click + next to AI instructions, choose New folder, type a name and press Enter.
1
Create a folder
Click + next to AI instructions and choose New folder. To create one inside another folder, use that folder’s + or … menu and choose New sub-folder. The folder appears as New folder with its name ready to edit: type a name and press Enter.
2
Add instructions
Click + on a folder and choose New instruction. An empty, open folder also shows Add instruction.
3
Move instructions and folders
Drag an instruction or a folder onto another folder. Hovering over a closed folder while dragging opens it so you can drop deeper inside. To take a nested item out of every folder, drop it on Move to top level. Without dragging, use Move on an instruction’s menu or Move to… on a folder’s menu.
Pin folders and set your own order
Pins and order change only your view. They follow you to other browsers, and they don’t change what teammates see or what the AI uses.
Pinned folders stay on top in both modes. In Custom order, folders and instructions you haven’t placed yet appear after the ones you have arranged. Reordering is personal, but moving an item into a different folder changes it for everyone.
Limit an instruction to channels or segments
Open an instruction, then choose Settings from the ⋮ menu in the editor header or from the instruction’s menu in the sidebar. The Instruction settings dialog has three parts: Active period, Restrict by Channel and Restrict by Contact Segments.- Restrict by Channel: turn on the channels where the AI may use the instruction. The list covers Web, Email, Phone, Slack, API, Web Voice, WhatsApp, Instagram, Messenger, SMS, X (Twitter), X Mentions, App Reviews and Internal. Leave every channel off to allow all of them.
- Restrict by Contact Segments: pick one or more contact segments. The AI uses the instruction only when the session’s contact belongs to at least one of them. A session without a known contact never gets a segment-restricted instruction. Leave it empty to allow everyone.
Channel and segment changes save as you make them and take effect right away, even on a published instruction. They don’t wait for Publish.
Apply the same limits to a whole folder
Choose Visibility on a folder’s … menu, set channels and segments, then click Apply to All. This replaces the limits on every instruction in the folder and its sub-folders. The folder itself keeps no rule: instructions you add or move into it later keep their own settings. If all the instructions already share the same limits, the dialog opens with them filled in; otherwise it starts empty.Schedule an instruction
Under Active period, turn on Limit to a time period and pick a start and an end. Either side can stay empty: a start alone means “from then on”, an end alone means “until then”. The end must be after the start. Turning the switch off removes the window.- Time zone. The picker uses your workspace time zone from Settings → Office Hours, or UTC until one is set. The start and end are stored as fixed moments when you save, so a later time zone change doesn’t move them.
- Outside the window, the AI doesn’t see the instruction on any channel, including phone agents. The instruction isn’t deleted when the window ends; it stays in your list and can be rescheduled.
- Publish to apply. On a published instruction, a schedule change is saved with the draft and goes live when you click Publish. Discard draft drops it.
Drafts, publishing and versions
Edits save automatically as you type. What the AI uses depends on the instruction’s state:- Publish makes the draft live and records a new version. It stays disabled while the instruction has suggested changes you haven’t accepted or rejected.
- Discard draft, in the version menu, throws away pending edits, including a pending schedule change, and returns to the published version.
- Unpublish, in the ⋮ menu, removes the instruction from your live AI agents and turns it back into a draft holding its last published content. Pending edits are dropped; version history is kept.
- Duplicate creates a draft copy named ”… (Copy)” in the same folder, with the same limits and schedule.
Review and restore versions
Click the version label in the editor header to open Version History. Each row shows the version number, who published it and when; the live one is marked Active. Click an older version to preview it read-only. While previewing, click Restore to publish that version’s content and schedule as a new version. Unpublished edits are discarded, and the instruction’s current channel and segment limits and folder stay as they are. The AI profile, shown as Agent Identity in the sidebar, has a draft and Publish too, but no version history.Troubleshooting
Related Documentation
AI Instructions overview
AI profile, instructions and folders.
Training scenarios
Write and format an instruction.
Test and measure
Test panel, insights and CSV export.
Office hours
The workspace time zone schedules use.