

Contacts in your OpenCX dashboard. The page has no sidebar entry: press ⌘K (Ctrl+K on Windows) and choose Contacts. See keyboard shortcuts. Viewing requires the Contacts permission with Read; adding, editing, importing and deleting contacts requires Write.
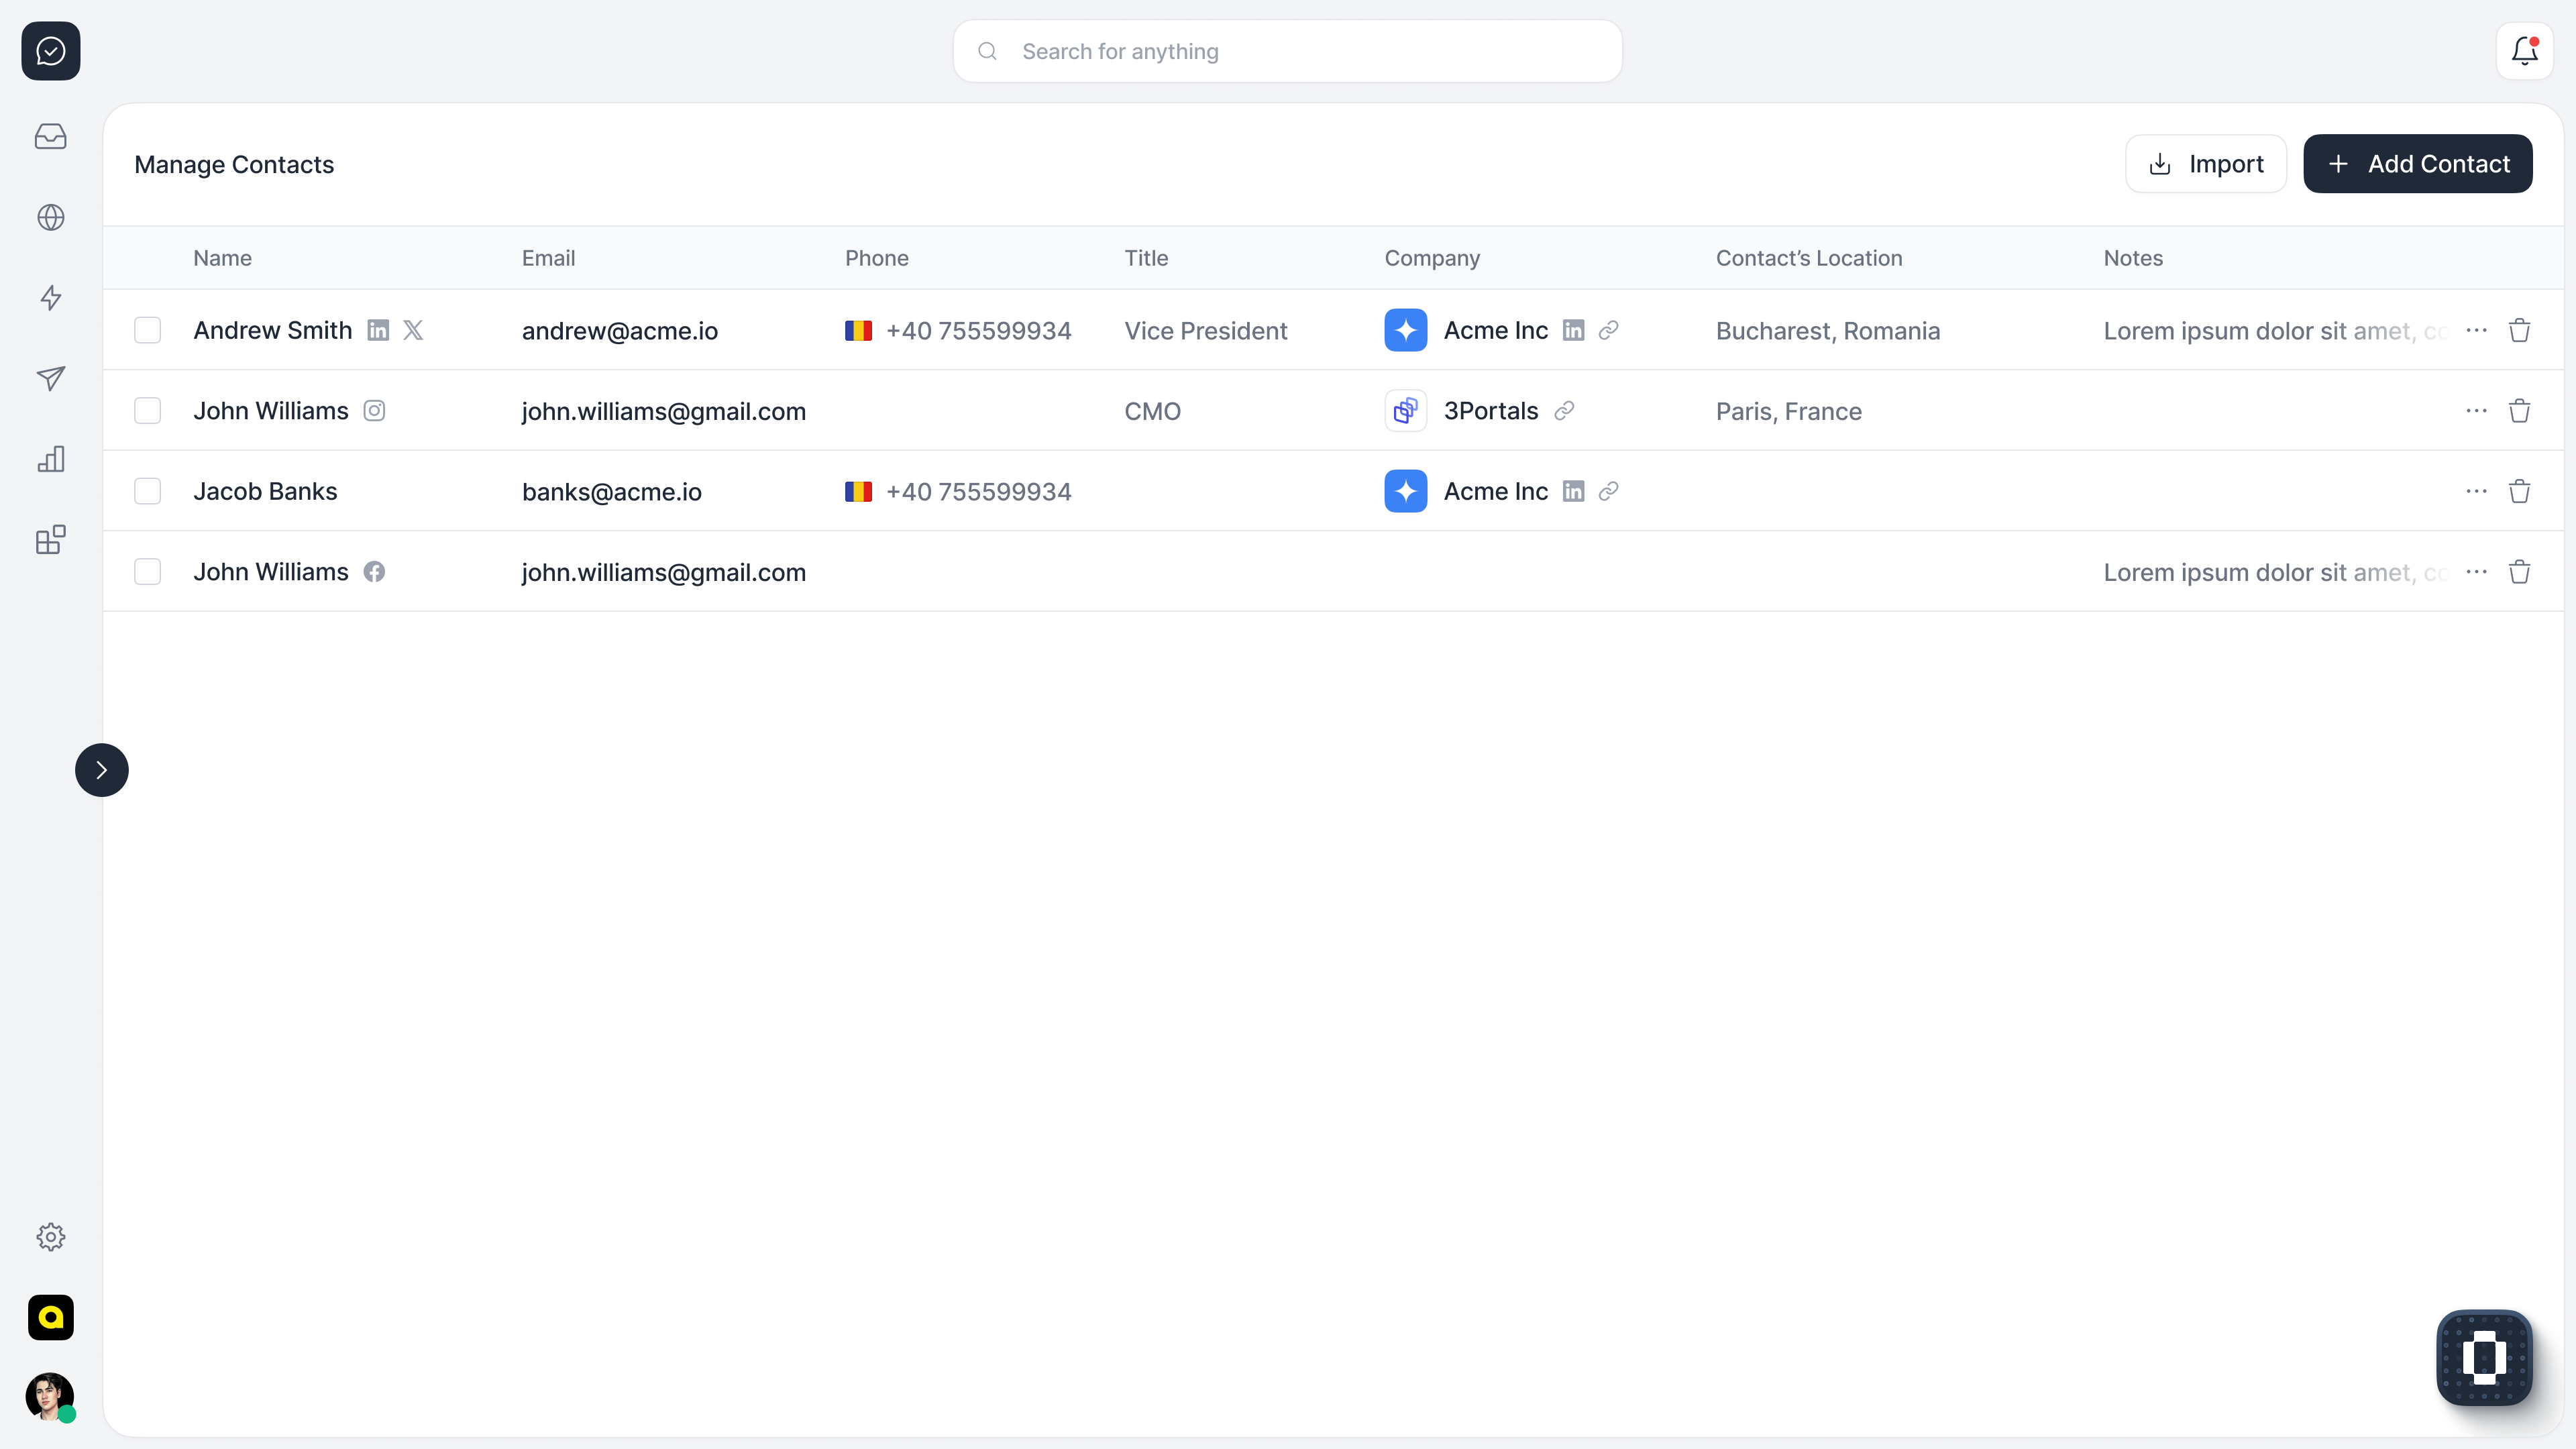
Terminology
What is a contact?
Create a contact
Using the API
Using the widget
From emails
From phone calls
From a CSV file
Advanced topics
Attach custom data to a contact
Restrict a contact's channels
What is a contact?
A contact is a person who talks to your AI agent or your team, on chat, phone, email or any other channel. A single contact can have many sessions across different channels.How do I create a contact?
You can create a contact in your organization in these ways:1. Using the API
We have a simple public API that allows you to manage contacts in your organization. You can use the API to create a contact or to authenticate a contact.2. Using the widget
Whenever you embed the OpenCX widget in your application, you can use the widget options to create a contact. Read more about this option in the widget documentation.3. From emails
When you send emails using our APIs, OpenCX automatically creates a contact for you (if it doesn’t exist yet) and assigns it to the session.4. From phone calls
When you receive (or initiate) a phone call using our APIs, OpenCX automatically creates a contact for you (if it doesn’t exist yet) and assigns it to the session.5. From the dashboard
On the Contacts page, select Add contacts → Add a contact and enter a Name and Email. Phone Number is optional and must include the country code.6. From a CSV file
Select Add contacts → Import from CSV to create or update up to 10,000 contacts from a file. See Import and export contacts.Adding custom data to a contact
We support attaching a phone number, email, or name to a contact. However, you can also add any custom data you want to associate with the contact. This data will be returned in the response and can be used for any purpose you want. Just make sure it’s a valid JSON string object. The custom data is a simple JSON object. You can add any key-value pairs you want to it, for example:Open the Contacts page
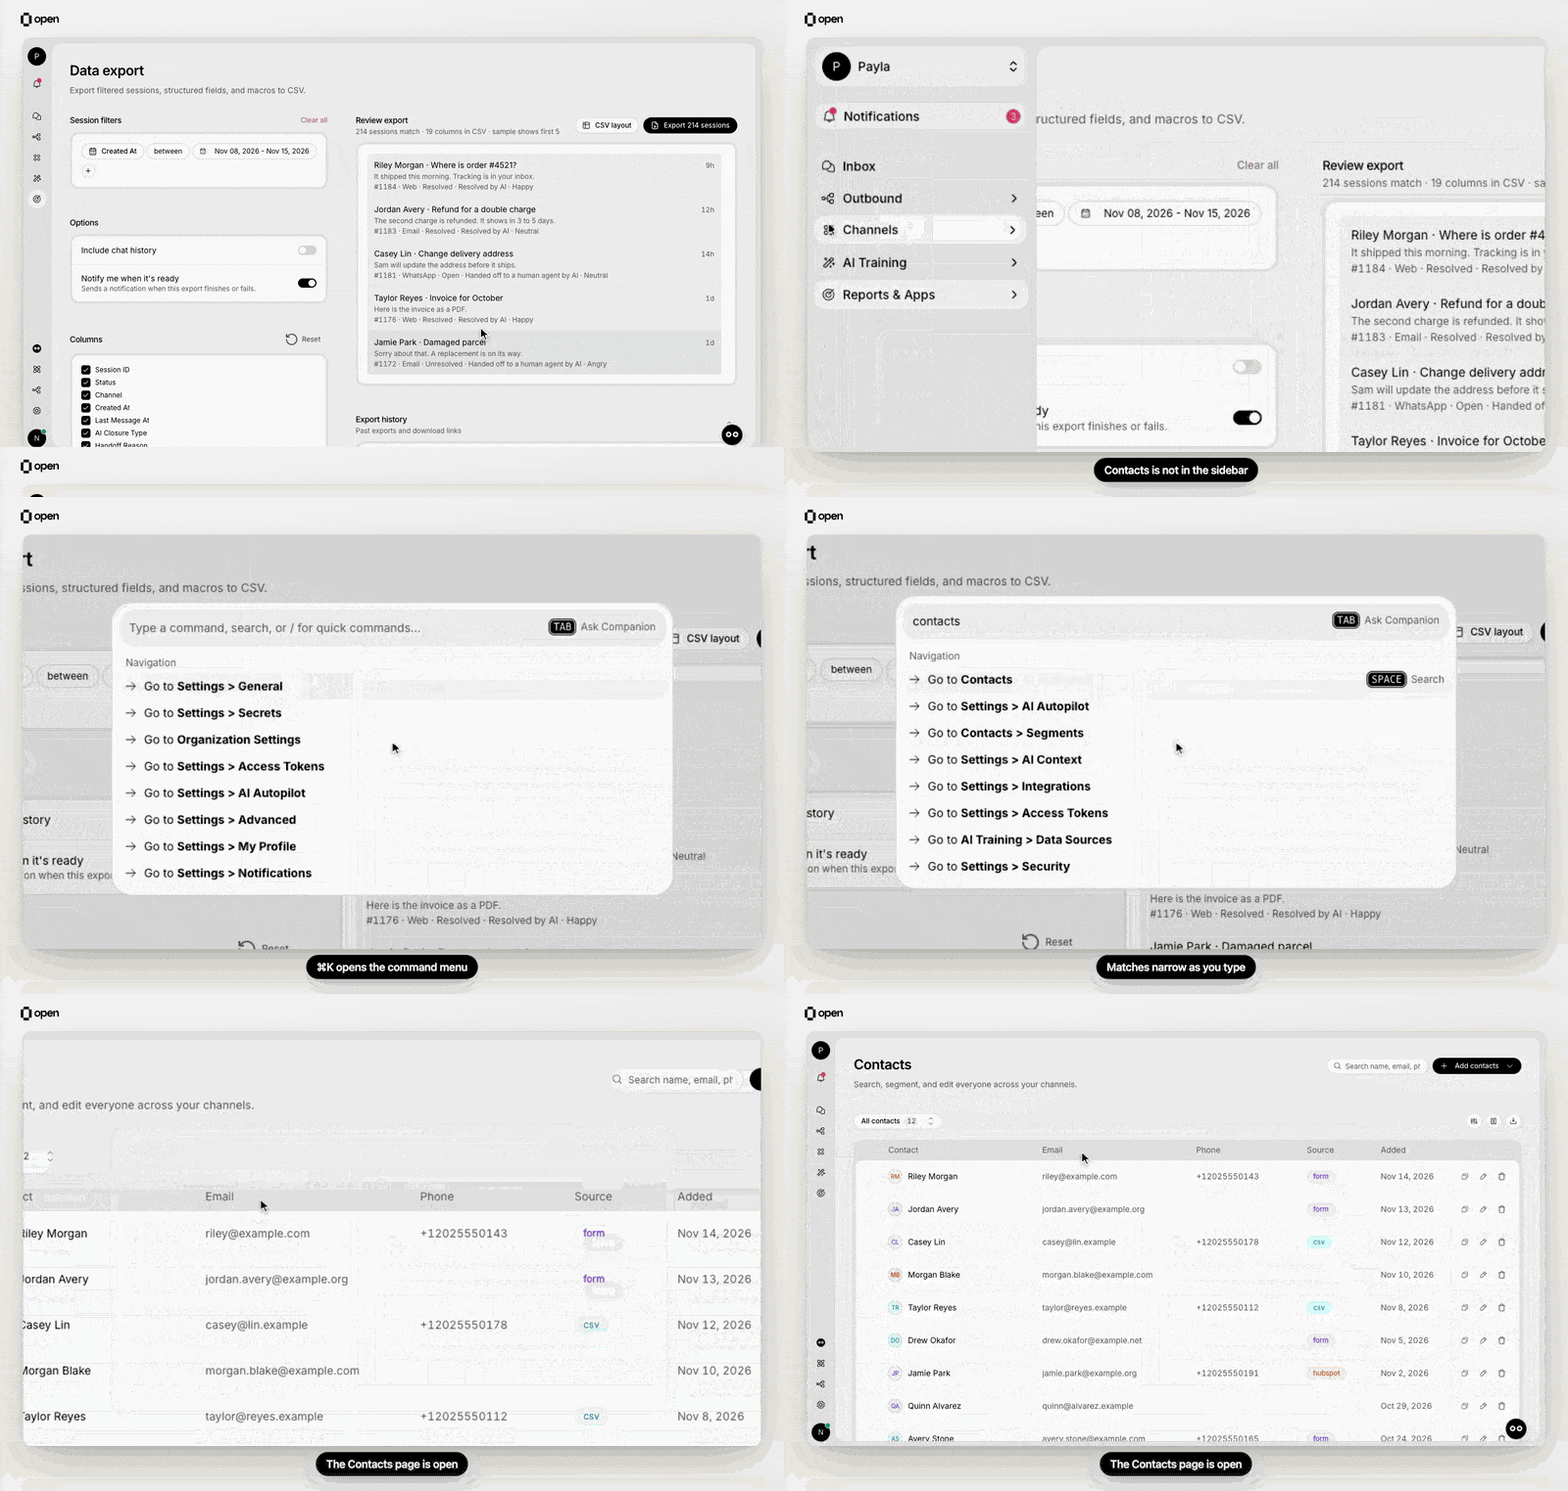
Contacts has no sidebar entry: press ⌘K, type contacts and select Go to Contacts.
- From a session in the inbox, select the contact’s name to open their contact page. In the command menu, View contact history opens the contact’s preview on the Contacts page, and Open contact profile opens their contact page.
- From the command menu, search for a contact and select the result to open their contact page.
- From a company, select the Contacts count on the companies list, or a contact on the company’s page.
Find contacts
Use the search box in the page header to search by name, email or phone. A search shows the top 1,000 matches; refine the term to narrow them. The menu at the top left of the list chooses a view: All contacts, or any segment, with the number of matching contacts. Manage segments opens the segments page.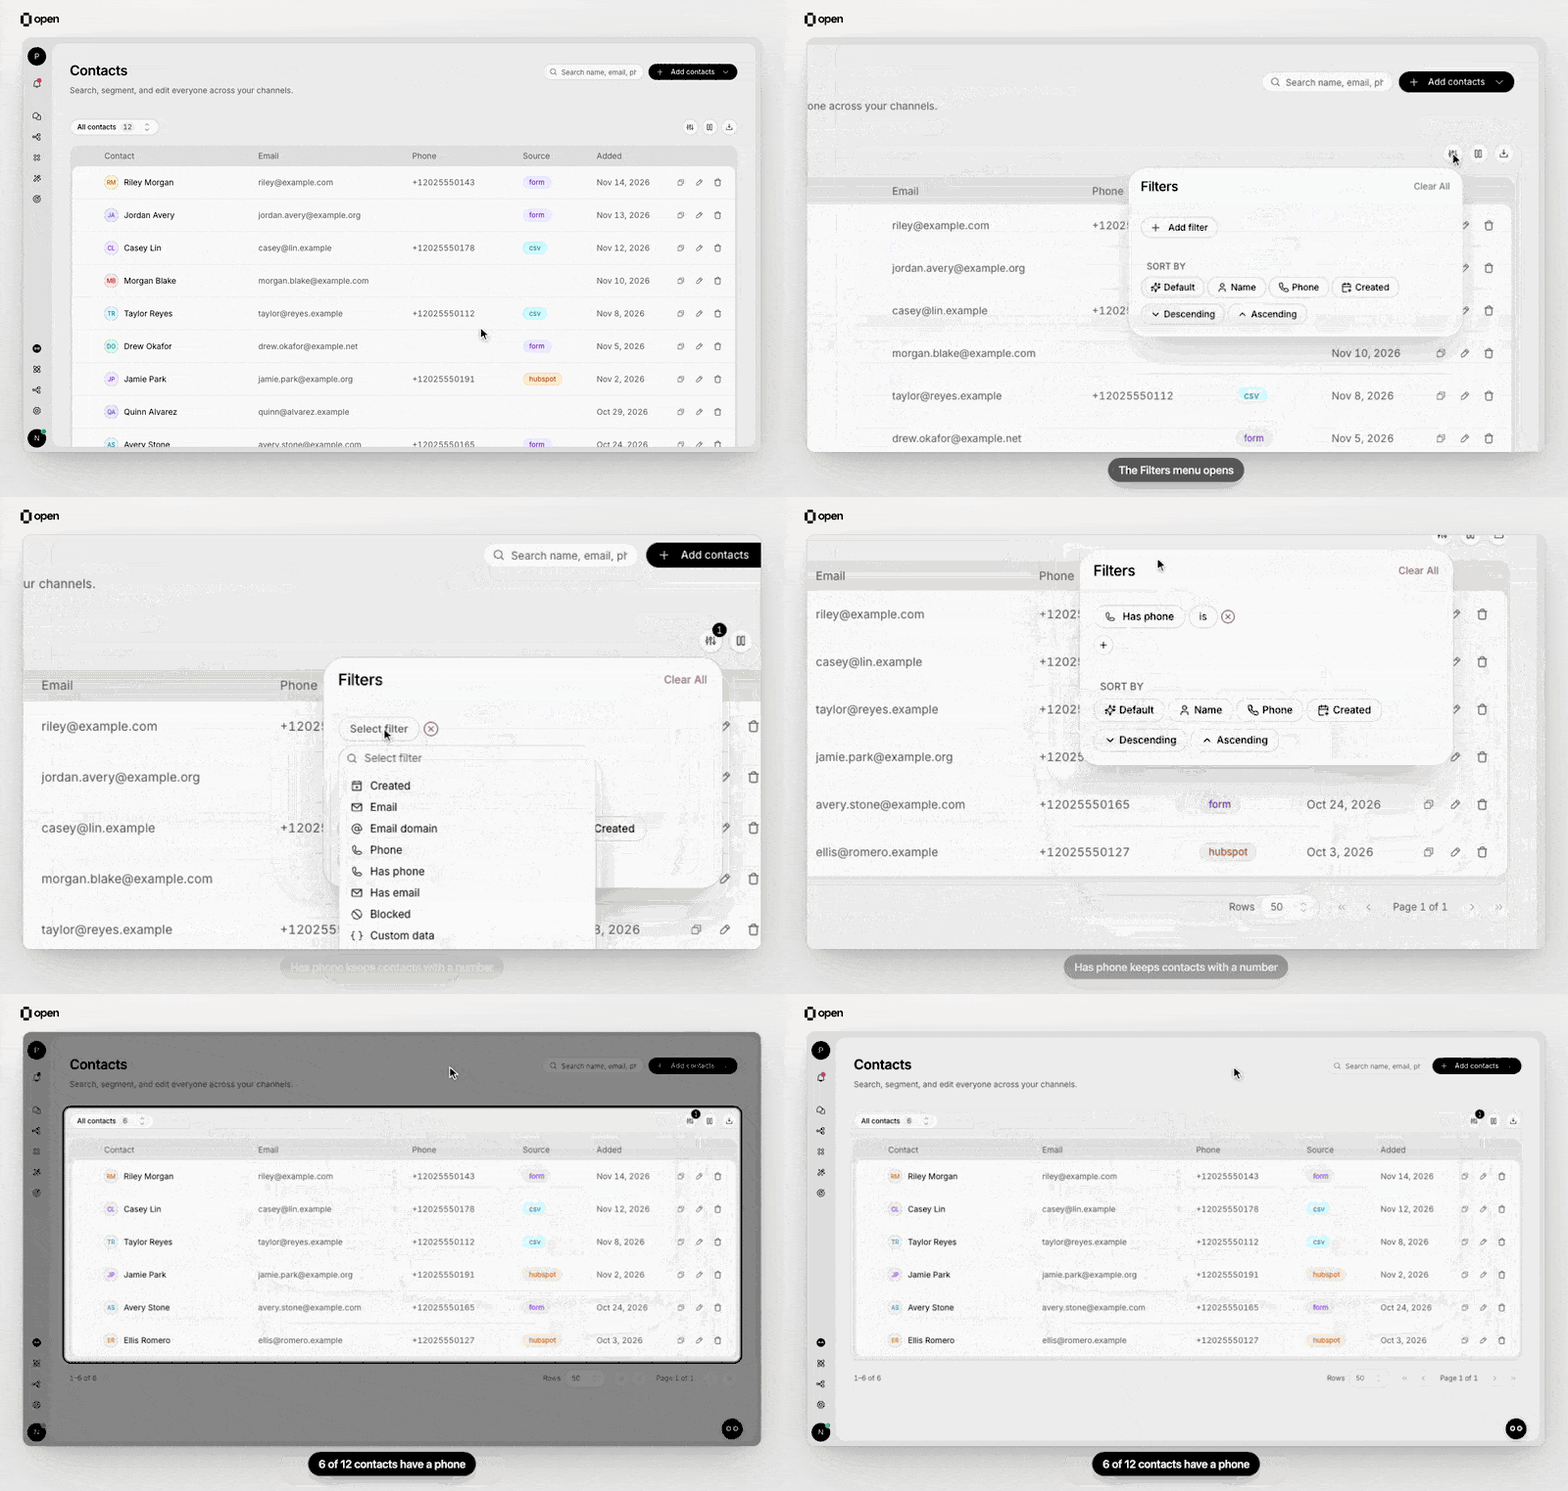
Filters menu, Add filter, Has phone: the list narrows to the 6 contacts with a phone number.
Use the + next to a filter to add more: AND adds a filter that must also match, and OR starts another group, so a contact appears when it matches every filter in any one group. Clear All removes the filters and keeps the selected view.
Under SORT BY, choose Default, Name, Phone or Created, then Descending or Ascending. Default orders by recent activity while browsing, and by relevance while searching. Selecting the Added column header also switches between newest and oldest first.
Choose columns
The list shows Contact, Email, Phone, Source and Added. Email, Phone and Source appear when at least one contact on the page has a value. Select the columns button (Columns) to add custom data keys as columns, under Custom properties. Your choice is saved in this browser for this workspace.Preview and edit a contact
Select a row to open the contact’s preview on the right, with the list still visible. The address bar holds the open contact, so you can share or bookmark the link. The preview shows:- The header: name, where the contact came from, and the date they joined.
- Details: Email and Phone, plus WhatsApp and Instagram usernames when known.
- Contact history: the contact’s sessions; see connected contact history.
- Sentiment: the share of positive, neutral and negative sessions.
- Attributes: the contact’s custom data. Values captured in conversations are listed under Auto-captured from conversations — read-only.
Use the contact page
The contact page (/contacts/<contact-id>/deepview) shows everything about one contact:
- Header: the editable name, email, external IDs, join date, phone and Instagram username, plus job title, company and LinkedIn profile when OpenCX has enriched the contact.
- Metrics: Total sessions, Handoff rate and Customer sentiment.
- Block and Unblock: a blocked contact can no longer interact with your AI agent. You can unblock them at any time.
- Companies: the companies the contact belongs to, with owner and attributes.
- Structured fields, Verified attributes and Non-verified attributes, which you can edit with Write.
- Enriched data: industry, company size, annual revenue and technologies, when known.
- Connected contacts and Sessions: see connected contact history.
Delete and export contacts
With Write, each row’s menu offers Copy (the email address), Edit and Delete, and ticking rows opens a selection bar with Export CSV and Delete. Deleting removes the contacts and their segment memberships permanently. To export the whole list or the current view with custom data columns, or to import a CSV, see Import and export contacts.Connected contact history
Accounts linked throughprimary_external_id share an agent-facing history view within your organization. The group includes every contact connected in either direction, including chains and cycles. Contacts referencing the same primary external ID belong to the group even when that primary contact has not been created. Session ownership stays with the original contact.
Review this history on the full contact page, in the preview that opens when you select a row in Contacts, or in Contact Session History in the inbox sidebar:
- The scope toggle appears only when the contact has an
external_idorprimary_external_id. Without either, the page shows that contact’s history without a redundant toggle. - All connected contacts is selected whenever you open a contact with either identifier.
- Select This contact to see only that contact’s sessions. Each view has its own selection.
- Use Load more to fetch further sessions. Each session card shows its actual contact. Contact pages and previews sort by creation date; the inbox sidebar sorts by latest message.
- Metrics and sentiment follow the selected scope and cover all permitted matching sessions, including pages you have not loaded. Snoozed sessions are included in history and metrics; the main inbox’s snooze filtering is unchanged.
external_id; select it to copy the ID. When the contact has a primary_external_id, a second row shows its primary contact. If your role can view contacts and that contact exists with a name, the row reads Primary Contact with the name linking to its profile and a copy button for its external ID. Otherwise, the row reads Primary Contact ID with the external ID, which you can select to copy. Rows without a value are hidden.
History uses current links. Linking an account includes its past sessions on the next refresh; clearing a link removes those sessions only when no other path still connects the accounts. General inbox contact filters, public session searches, and customer widget history keep their existing scope.
Restricted channels
A contact can ask not to be contacted on a channel: a health plan member who asks, for privacy, not to be phoned, or a customer who opts out of text messages. Record it on the contact as restricted channels, any ofemail, sms, whatsapp and phone_voice (phone calls). Nothing changes for a contact until a channel is restricted.
What a restriction stops
On a restricted channel, nothing that your team, workflows, sequences, scheduled follow-ups, satisfaction surveys or the API start is sent to the contact, transactional messages included. For example, withemail restricted, an agent can’t start an email session with the contact, a workflow’s Send Email Template step fails, and Send emails refuses the request.
Replies still go through. When the contact writes in on a restricted channel, the AI’s answers and your agents’ replies in that session are delivered on that channel, so the contact is answered where they chose to write. A message in that session that the contact didn’t prompt, such as a scheduled follow-up or a satisfaction survey, is still refused.
- Refused sends are never delivered, and say why. API calls get HTTP
422witherror: "contact_channel_restricted", and workflow steps fail with the reason. See refused sends. - Agents see it before they send. In the inbox, the reply box says when the contact restricted the session’s channel. The new session dialog doesn’t offer a channel the picked contact restricted, and the call button is unavailable for a contact who restricted phone calls.
- Sequences skip instead of failing. A sequence step on a restricted channel is skipped, and steps on other channels still send. See contacts who restricted a channel.
- The restriction follows the address. When any contact in your organization with the same email address, phone number or WhatsApp account restricted a channel, sends to that address on that channel are refused, so a duplicate contact doesn’t get around it.
- Only the addressed recipient is checked. An address copied on an email in Cc or Bcc is not checked.
- Connected ticketing systems decide their own sends. A message that a connected ticketing system delivers itself follows that system’s settings, so record the preference there too.
Set restricted channels
- Dashboard: open the contact, or select it in the contacts list, and turn on a channel under Communication restrictions. Each switch saves right away. Changing them needs permission to edit contacts; without it, the switches only show the current list.
- API: Set restricted channels replaces the list; an empty list lifts every restriction. Get, list and search return
restricted_channels. - MCP:
set_contact_restricted_channelsreplaces the list, andget_contactreturns it. See MCP tools. - Workflows: the Restrict Contact Channels step adds, removes or replaces channels, for example when a customer replies “please stop texting me”. See Restrict contact channels.
Restricted channels and the outbound blocklist
A restriction belongs to the contact and covers a whole channel. The outbound blocklist covers a single address. To honor “call my mobile, not my home number”, add the home number to the outbound blocklist instead of restricting phone calls. A send to a blocked address is refused the same way, witherror: "contact_address_blocked". Entries recorded when someone unsubscribes from email or opts out of WhatsApp marketing keep their marketing-only meaning: they still stop sequences, but not transactional messages or satisfaction surveys.
Related Documentation
Import and export
Bring contacts in from CSV, or download them.
Segments
Group contacts with saved conditions.
Companies
Accounts your contacts belong to.
Contacts API
Create, update and search contacts.